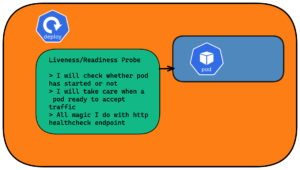
Liveness and Readiness probes are required in Kubernetes deployment to prevent deadlock of your application deployed and zero missing request while pod is initializing. When probe is configured in kubernetes deployment, each pod will go through probe conditions.
Liveness and readiness probes will be applicable to new pod which is created by horizontal pod autoscaling (hpa)
We are going to learn how to configure probes in kubernetes deployment:
Liveness probe: It will take care of the container when it is in deadlock or application not running by restarting container
Readiness probe: It will take care of the pod when to join the service to serve traffic
Prerequisites:
1) kubectl cli should be installed in your local
2) Connect to the kubernetes cluster
3) /health API should be enabled in application
4) Configmaps related to deployment should be deployed before deployment
Step 1:
Configure the liveness and readiness probe in the deployment yaml
Liveness probe:
livenessProbe:
  httpGet:
    path: /health
    port: 8080
  initialDelaySeconds: 60
  periodSeconds: 3
Note: Liveness probe should be configured under template.spec.containers section under deployment yaml
Readiness probe:
readinessProbe:
  httpGet:
    path: /health
    port: 8080
  initialDelaySeconds: 60
  periodSeconds: 3
Readiness probe configuration is similar to liveness probe and should be configured under template.spec.containers section under deployment yaml
Sample Deployment Yaml with probes:
apiVersion: apps/v1
kind: Deployment
metadata:
  name: Myapp-deployment
  labels:
    apptype: java
spec:
  replicas: 3
  selector:
    matchLabels:
      apptype: java
      tier: web
  template:
    metadata:
      labels:
        apptype: java
        tier: web
    spec:
      containers:
      - name: [container name]
        image: [image from any container registry]
        command: ["/bin/sh"]
        args: ["java -Xmx2g -Xss256k -XX:MaxMetaspaceSize=256m -XX:+UseG1GC -XX:+HeapDumpOnOutOfMemoryError -XX:HeapDumpPath=/var/log/my-heap-dump.hprof -XX:+PrintGCDetails -XX:+PrintGCDateStamps -Xloggc:/var/log/myAppgc.log -jar [application.jar] --spring.config.location=[absolute path of the config maps mounted] "]
        ports:
        - containerPort: 8080
        volumeMounts:
        - name: appconfig
          mountPath: "/config/application"
          readOnly: true
        livenessProbe:
          httpGet:
            path: /health
            port: 8080
          initialDelaySeconds: 60
          periodSeconds: 3
        readinessProbe:
          httpGet:
            path: /health
            port: 8080
          initialDelaySeconds: 60
          periodSeconds: 3
      volumes:
      - name: appconfig
        configMap:
        name: [configmap-name]
Note: InitialDelaySeconds need to be higher value than application start up time
Here are the few fields we need to consider while configuring probes:
- initialDelaySeconds: Number of seconds after probe will start
- periodSeconds: gap between probe start
- timeoutSeconds: probe time out
- successThreshold: number of success probes after failure
- failureThreshold: Waiting time to perform restart container(Liveness Probe) and marking container unready(Readiness Probe)
- scheme: HTTP or HTTPS Defaults to HTTP.
- path: Path to access on the endpoint
- port: port to access on the container
Step 2:
Save the above mentioned deployment yaml and deploy it in kubernetes cluster by executing the below command
kubectl apply -f [deployment.yaml]
Conclusion:
Liveness and readiness probes will be very useful for the applications to route the traffic to stable/available pods which are passed with the health checks performed in probes.